Archive

Posts Tagged ‘writing fluency’

Knowledge of Language | Anchor Standards for Language

Tucked away in the often-overlooked recesses of the Common Core State Standards, the Anchor Standards for Language includes a practical, if somewhat ambiguous Standard: Knowledge of Language L.3. Over the past decade, I’ve noted with interest that the educational community has cherry-picked certain Standards and ignored others.

As an author of numerous ELA curricula, I assumed that the initial focus (rightfully so) of district curriculum implementation would be the reading, writing, and math Standards. In my field, I decided to write in anticipation of the next focus area. I assumed that, for ELA, it would center on the Anchor Standards for Language. These Language Standards were quite revolutionary in some circles because the Common Core authors emphasized the direct instruction of grammar, usage, and mechanics. Furthermore, the authors provocatively addressed the issue of non-Standard English and seemed to swing the pendulum toward a traditional grammar approach. Think rules, correct and incorrect usage, and application.

Over the next two years I poured hours into the development of comprehensive grades 4, 5, 6, 7, 8, and high school programs to teach all of the Standards in the Language Strand. My Teaching the Language Strand title was ill-chosen. Much to my chagrin, ELA teachers rarely got past the Reading and Writing Standards. I moved the title to the subtitle position and re-named the series Grammar, Mechanics, Spelling, and Vocabulary . The longest title in the history of educational publishing. Subsequently, I broke the comprehensive program into affordable grade-level slices and achieved more sales: Teaching Grammar and Mechanics, Writing Openers Language Application, Differentiated Spelling Instruction, and the Common Core Vocabulary Toolkit.

Syntax in reading and writing

Syntax in Reading and Writing

And now, Syntax in Reading and Writing.

Even within the largely ignored Anchor Standards for Language, one Standard, in particular, has received scant recognition:

The Hidden Gem: Knowledge of Language Standard L.3

CCSS.ELA-LITERACY.CCRA.L.3
Apply knowledge of language to understand how language functions in different contexts, to make effective choices for meaning or style, and to comprehend more fully when reading or listening.
The key word in the Knowledge of Language Standard is apply. The somewhat ambiguous term, language, refers to the other five Standards in the Language Strand which encompass grammar, usage, mechanics, spelling, and vocabulary. The purpose of this practical Standard is to help students more fully comprehend how language impacts reading and informs writing and apply this knowledge. The slice of my Grammar, Mechanics, Spelling, and Vocabulary series, which aligns to the Knowledge of Language Standards L.3 is Writing Openers Language Application.
Writing Openers Language Application (Grades 4, 5, 6, 7, and 8) provides 56 whole-class, twice-per-week “quick writes,” designed to help students learn, practice, and apply grade-level grammar, usage, mechanics, sentence structure, and sentence variety Standards. The Common Core authors are certainly right that grammar should not be taught solely in isolation. Grammatical instruction needs to be taught in the reading and writing contexts and applied in spoken and written language.

The grade-level Writing Openers programs align to the Anchor Standards for Language:

Each of the 56 lessons takes about 5­-10 minutes to complete. Lessons are derived from the Conventions of Standard English (L. 1, 2), Knowledge and Use of Language Standards (L. 3), and the Language Progressive Skills found in the Common Core State Standards Language Strand. The lessons help students “Use knowledge of language and its conventions when writing, speaking, reading, or listening” (Common Core Language Strand Knowledge of Language). In other words, lots of practice in sentence revision, sentence combination, and identification of and application of grammar.

The lessons are formatted for classroom display and interactive instruction. The teacher reads and explains the Lesson Focus and Example(s) while students follow along on their own accompanying worksheet. Next, the students annotate the Lesson Focus and summarize the Key Idea(s). Afterwards, the students complete the Practice Section (sentence combining, sentence revisions). Finally, students complete the My Own Sentence writing task. The My Own Sentence serves as the formative assessment to determine whether students have mastered the Lesson Focus.

Plus, get 13 sentence structure worksheets with answers. Worksheets include simple subjects, compound subjects, simple predicates, compound predicates, simple sentences, compound sentences, complex sentences, compound-complex sentences, identifying sentence fragments, revising sentence fragments, identifying sentence run-ons, revising sentence run-ons, and identifying parallelism.

FREE SAMPLE LESSONS TO TEST-DRIVE THE PROGRAMS

Preview the Writing Openers Language Application (Grade 4) Lessons HERE.

Preview the Writing Openers Language Application (Grade 5) Lessons HERE.

Preview the Writing Openers Language Application (Grade 6) Lessons HERE.

Preview the Writing Openers Language Application (Grade 7) Lessons HERE.

Preview the Writing Openers Language Application (Grade 8) Lessons HERE.

Get the Grammar and Mechanics Grades 4-8 Instructional Scope and Sequence FREE Resource:

Get the Diagnostic Grammar and Usage Assessment FREE Resource:

Get the Diagnostic Mechanics Assessment FREE Resource:

Grammar/Mechanics, Spelling/Vocabulary, Writing , , , , , , , , , , , , , , , , , , , , , , , , , , , , , , , , , , , , , , , , , , , , , , , , , , , , , , , , , , , ,

How to Teach a Write Aloud

Writing is a complicated thinking process. It requires an enormous amount of multi-tasking, problem-solving, interactivity, and creativity. There is science to effective writing, but there is also art. Unlike reading, which provides the author component of the dialog between reader and text, writing requires the thinker to generate both sides of the dialog. The writer must create the content and anticipate the reader response. Like reading, writing is chiefly learned through direct instruction, modeling, and practice.

Of the three instructional components necessary for effective writing instruction (direct instruction, modeling, and practice), the Write Aloud strategy focuses on the modeling component. In essence, the teacher shows students how he or she composes by thinking out loud and writing out that process so that students can think along with the writer. The Write Aloud is also referred to as “Modeled Writing.”

Writing is certainly not a natural process. Developing writers do not have a priori understanding about how to compose. Thus, teachers play a crucial role in helping to develop good writers.

Teaching students to carry on an internal dialog with their anticipated readers while they write is vitally important. “Talking to the reader” significantly increases writing coherency. Placing the emphasis on writing as the reader will read that writing also helps the writer determine the structure of that writing and so unify the whole.

Good writers are adept at practicing many metacognitive strategies.  That’s a big word that means “thinking about thinking.”  Students who practice these self-monitoring strategies develop better writing fluency those who do not.

Write Aloud Sample Lesson

1. Select a short, high interest section of dialog from a story familiar to all students. The dialog will help students understand the interactive components of the Write Aloud strategy. Post the dialog on the board, Smartboard®, or display projector. Write this brief prompt, or one of your own, below the dialog: “Analyze the character development in ___________.”

2. Tell them that they are to listen to your thoughts carefully, as you read the brief dialog from ____________, and that they are not allowed to interrupt with questions during your reading. Read the short dialog out loud and interrupt the reading frequently with concise comments about the plot context and what and why the characters are saying what they say. Focus on comprehension, not character development for your first read.

3. After reading, ask students if they think they understood the text better because of your verbalized thoughts than just by passively reading without active thoughts. Their answer will be “Yes,” if you have read effectively. Quickly remind students to listen well and not to interrupt.

4. Tell students that they are now going to learn an important thinking strategy, and that they will listen to your thoughts as an experienced writer. Tell them that your thoughts will not be the same thoughts as theirs. Explain that learning how to think is the focus of this activity, not what to think. Tell them that they can improve the ways in which they think.

5. Tell students that you are going to brainstorm ideas for a character analysis essay during your Write Aloud. Point to the word brainstorm on your Writing Process charts and tell students that you are only going Write Aloud this one part of the process. Remind students that they are to listen to your thoughts carefully, but they are not allowed to interrupt with questions during the activity.

6. Now, read the prompt out loud and define analyze as “to break apart the subject and to explain each part” as if you are reminding yourself of the definition. Re-read the dialog out loud and interrupt the reading frequently with concise comments about how the characters are saying what they say. Write down your comments below the dialog in a graphic organizer. Explain that you are going to use a mapping, a.k.a. bubble cluster, graphic organizer to brainstorm your ideas because it will help you organize your thoughts and allow you to add on new ones as you think of them. Focus your comments (and writing) on these four components: character personalities, descriptions, motives, and author word choice. Ask if the organization and comments will make sense to the reader. Don’t ramble on with personal anecdotes. Comment much more on the text than on your personal connection with the text.

7. After reading, ask students if listening to you think and watching you write down your thoughts helped them understand how the characters are saying what they say. Their answer will be “Yes.” Ask students to repeat what you said that most helped them understand your thinking process. Ask students how they would think differently about what to write, if they were teaching the Write Aloud.

8. Post two new dialogs on the board, Smartboard®, or display projector with the same prompt as above.

9. Group students into pairs and have students practice their own Write Alouds, using the two dialogs. This can get quite noisy, so establish your expectations and remind students that they will be turning in their graphic organizers.

10. Repeat the Write Aloud procedure often with different components of the Writing Process, with or without different prompts, and with different writing tasks or genre.

*****

Teaching Essays

TEACHING ESSAYS BUNDLE

The author’s TEACHING ESSAYS BUNDLE includes the three printable and digital resources students need to master the CCSS W.1 argumentative and W.2 informational/explanatory essays. Each no-prep resource allows students to work at their own paces via mastery learning. How to Teach Essays includes 42 skill-based essay strategy worksheets (fillable PDFs and 62 Google slides), beginning with simple 3-word paragraphs and proceeding step-by-step to complex multi-paragraph essays. One skill builds upon another. The Essay Skills Worksheets include 97 worksheets (printables and 97 Google slides) to help teachers differentiate writing instruction with both remedial and advanced writing skills. The Eight Writing Process Essays (printables and 170 Google slides) each feature an on-demand diagnostic essay assessment, writing prompt with connected reading, brainstorming, graphic organizer, response, revision, and editing activities. Plus, each essay includes a detailed analytical (not holistic) rubric for assessment-based learning.

Reading, Writing , , , , , , , , , , , , , , , , , , , , , , ,

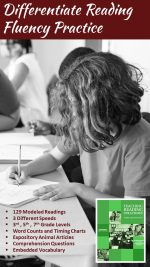
How to Differentiate Reading Fluency Practice

How to Differentiate Reading Fluency Practice

Differentiate Reading Fluency Practice

Educators value the importance of reading fluency practice. High fluency scores are positively correlated with high reading comprehension scores. The converse is true as well. Repeated reading practice and reading along with modeled readings have shown to increase accuracy, speed, intonation, expression, and attention to punctuation. Additionally, practicing along with modeled readings at a slightly faster pace than students’ assessed word counts per minute seems to help students push through habituated reading speeds to read faster with greater automaticity.

Of course, to differentiate reading fluency practice, the teacher needs to have have completed a diagnostic reading fluency for each child. My “Pets” Fluency Assessment is free to use and has a unique tiered design from easy to hand, ensuring that the teacher will be able to assess approximate reading level in addition to word count and accuracy.

Two 15-Minute Instructional Fluency Options:

Tech-Based and Print

  1. Individualized Instruction with Modeled Readings Online. 123 YouTube expository passages recorded at the three different “challenge level” reading speeds (available in the value-priced Reading Fluency and Comprehension Toolkit or in The Science of Reading Intervention Program). Each passage has been constructed in the tiered design. The same passage is used for vocabulary and comprehension practice with 5 embedded questions per passage.
  2. Small Ability Group Instruction with Print Copies of Reading Fluency Passages.  These procedures have been field tested in grades 4, 5, 6, 7, and 8 classes.
  • Show students a list of the fluency groups on the board or display and place an asterisk by the first Fluency Leader chosen for each group. Inform students that you will rotate Fluency Leaders and that these students have two duties: Collect and return the group materials and ask the teacher when a student in their group needs help or has a question. Ask the Fluency Leaders to get the materials (fluency folders, pencil box, and one fluency passage) for each student in their groups.
  • Have students each create their own fluency folders (a simple file folder is fine) and put a bar graph inside the folders. A quick web search will bring dozens of fluency bar graphs for your selection. Select a bar graph that best matches the fluency speeds of your students. If in doubt, pick the higher level bar graph, because students tend to “overestimate” their scores on the fluency timings. Collect the fluency folders.
  • As the Fluency Leaders gather and distribute the materials, show students the location of their fluency group and the desk/tables and chairs configuration on the board or overhead. Tell students that they will move desks/tables and chairs to form their fluency groups as shown. To signal readiness, the students will raise their hands. Inform them that fluency groups will receive participation points and incentives for “quick, quiet, and cooperative” transitions. Tell students to now move into their fluency groups.
  • When all groups are ready, award participation points for “quick, quiet, and cooperative” transitions. Tell students that they will read the fluency passage out loud, but softly, for a two-minute timed “cold” (unpracticed) timing. Ready the stopwatch or use the second hand of the clock to time. Say– “Point to the first word of the fluency passage. Ready, begin.” As students read, monitor the groups to ensure that students are reading quietly, but above a whisper. All words must be said out loud for effective practice. After two minutes, say “Stop and Record.”
  • Tell students to tally their words and record their “cold timing” score on the fluency bar graph in pencil. Model how to record the timings on the board or overhead. Inform students that after they finish recording the “cold timing,” they are to continue reading where they left off, then re-read the passage over and over until the teacher visits their group.
  • Visit the lowest level fluency group and quickly pre-teach a few challenging words from the passage by saying the word and asking students to repeat the word. Briefly define the words, if they are necessary to the meaning of the fluency passage.
  • Tell students that the Fluency Leader will lead the group at the reading pace set by the teacher and finish choral reading the fluency passage. Have the Fluency Leader say “Ready, begin” and begin reading. When the group is following the direction of the Fluency Leader and is reading at the appropriate rate, move on to the next group. Afterwards, the group is to re-play the YouTube video or chorally re-read the whole passage together one more time.
  • After the second fluency practice, students are to individually re-read the passage out loud as fast as they feel comfortable until the teacher says, “Stop.”
  • After the last group visited by the teacher has completed its choral readings, interrupt the class to complete a two-minute “hot” reading of the passage. Have students tally their words per minute and record their score in pen on the fluency bar graph, directly above the “cold” timing.
  • Tell Fluency Leaders to collect materials, while the groups re-organize the desks/tables. When all students have returned to their seats and all materials have been properly collected, award participation points for “quick, quiet, and cooperative” transitions.

Helpful Hints

Work on attention to punctuation and expression. Students should read softly, but above a whisper. An entire class reading at this level provides a “white noise” that promotes individual concentration. Play the YouTube videos at reasonable volume levels or use headphones.

Assess progress by examining the day to day recorded “cold” readings. Although students may tend to “inflate” their “cold” and “hot” timing differentials, emphasize improvement in the “cold” timings over time.

Use your Fluency Leaders! Only Fluency Leaders get out of their seats during Fluency Remediation to gather materials or ask the teacher questions.

Integrate fluency and comprehension instruction. Teach students to “talk to the text” as they read to improve concentration and understanding. Periodically do a “Think-Aloud” to model interactive, metacognitive reading. Teach comprehension questions that will emphasize reader independence.

Also tie in vocabulary development by having the students write context clue sentences for the vocabulary words that you pre-teach.

With these procedures, your fluency groups will thrive and students will significantly improve their reading fluency.

*****

Intervention Program Science of Reading

The Science of Reading Intervention Program

The Science of Reading Intervention Program: Word Recognition includes explicit, scripted instruction and practice with the 5 Daily Google Slide Activities every reading intervention student needs: 1. Phonemic Awareness and Morphology 2. Blending, Segmenting, and Spelling 3. Sounds and Spellings (including handwriting) 4. Heart Words Practice 5. Sam and Friends Phonics Books (decodables). Plus, digital and printable sound wall cards and speech articulation songs. Print versions are available for all activities. First Half of the Year Program (55 minutes-per-day, 18 weeks)

The Science of Reading Intervention Program: Language Comprehension resources are designed for students who have completed the word recognition program or have demonstrated basic mastery of the alphabetic code and can read with some degree of fluency. The program features the 5 Weekly Language Comprehension Activities: 1. Background Knowledge Mentor Texts 2. Academic Language, Greek and Latin Morphology, Figures of Speech, Connotations, Multiple Meaning Words 3. Syntax in Reading 4. Reading Comprehension Strategies 5. Literacy Knowledge (Narrative and Expository). Second Half of the Year Program (30 minutes-per-day, 18 weeks)

The Science of Reading Intervention Program: Assessment-based Instruction provides diagnostically-based “second chance” instructional resources. The program includes 13 comprehensive assessments and matching instructional resources to fill in the yet-to-be-mastered gaps in phonemic awareness, alphabetic awareness, phonics, fluency (with YouTube modeled readings), Heart Words and Phonics Games, spelling patterns, grammar, usage, and mechanics, syllabication and morphology, executive function shills. Second Half of the Year Program (25 minutes-per-day, 18 weeks)

The Science of Reading Intervention Program BUNDLE  includes all 3 program components for the comprehensive, state-of-the-art (and science) grades 4-adult full-year program. Scripted, easy-to-teach, no prep, no need for time-consuming (albeit valuable) LETRS training or O-G certification… Learn as you teach and get results NOW for your students. Print to speech with plenty of speech to print instructional components.

SCIENCE OF READING INTERVENTION PROGRAM RESOURCES HERE for detailed product description and sample lessons.

FREE DOWNLOADS TO ASSESS THE QUALITY OF PENNINGTON PUBLISHING RESOURCES: The SCRIP (Summarize, Connect, Re-think, Interpret, and Predict) Comprehension Strategies includes class posters, five lessons to introduce the strategies, and the SCRIP Comprehension Bookmarks.

Get the SCRIP Comprehension Strategies FREE Resource:

Get the Diagnostic ELA and Reading Assessments FREE Resource:

Get the Pets Fluency Assessment FREE Resource:

Literacy Centers, Reading , , , , , , , , , , , , ,